All IOS have tools to analyse your impression prior to sending the scan to a lab. They are extremely valuable and as a production facility, we highly value them.
When gathering a scan for a crown, whether in the anterior or posterior, these tools are available to you on every IOS System.
- Bite Analysis:
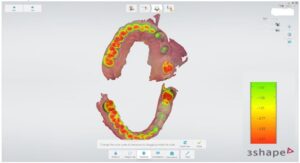
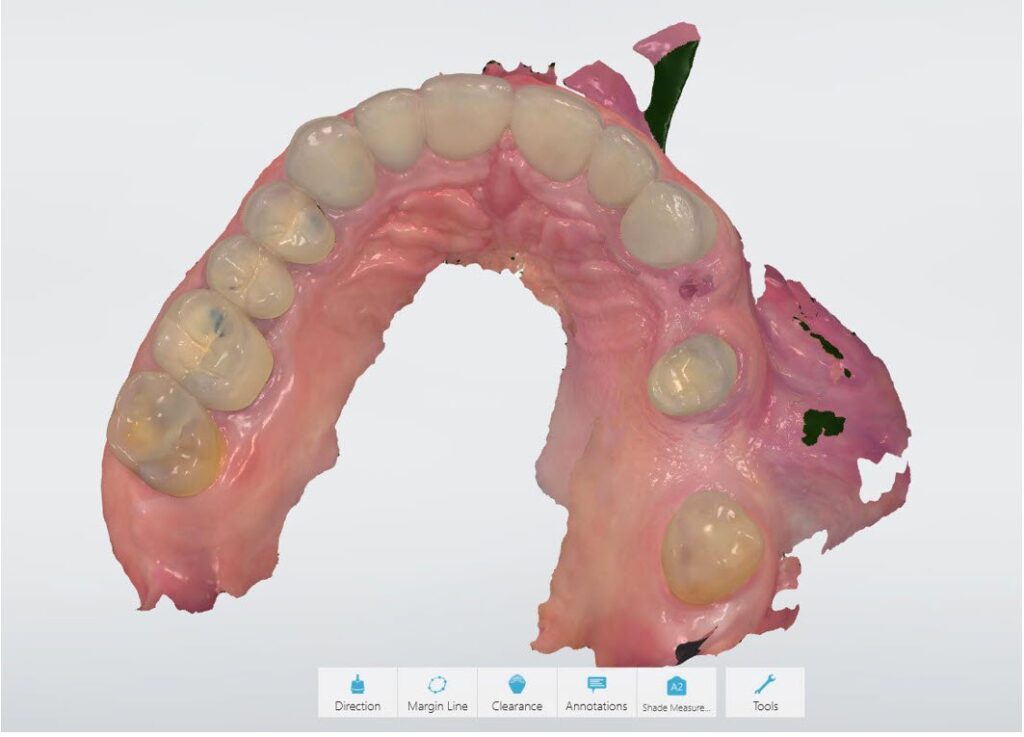
As you can see from the measurement tool on the lower right, the bite is red all the way around the arch. This means the patient was occluding correctly.
When taking full arch impressions with an IOS, two bites, one on each side of the arch, is recommended. If the bite was not in occlusion, the marks would be a lighter color yellow to green. Deleting the current bite and taking another bite is the recommended action.
2. Undercut Analysis
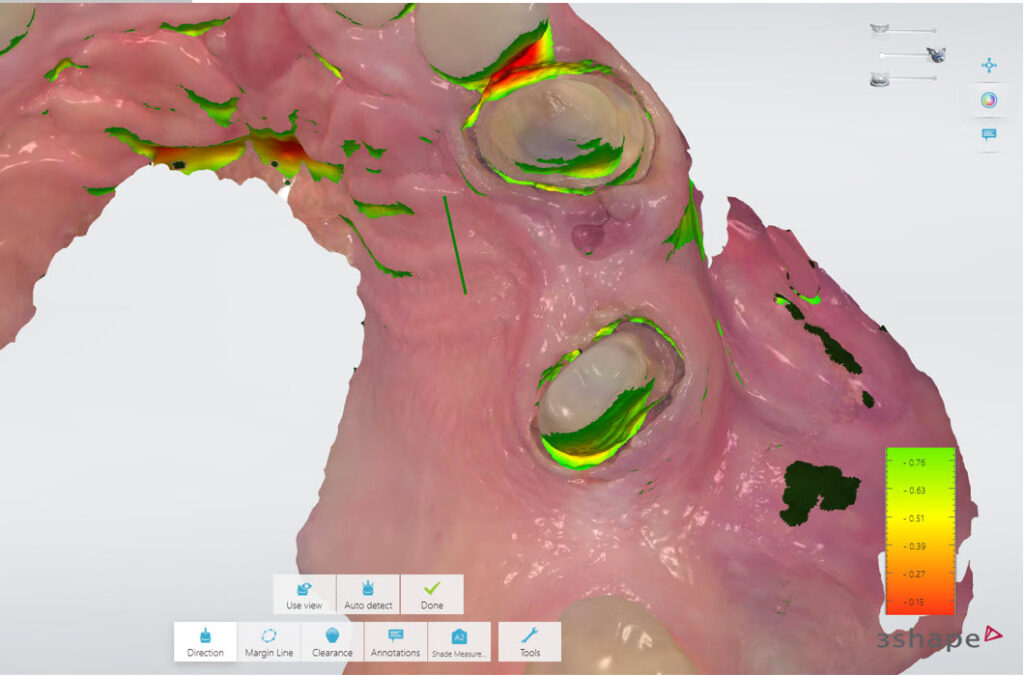
When a crown prep is done or a long span bridge, it is recommended to use this tool to analyse insertion direction. If there is an interference, this is easily rectified prior to sending to the lab or making a temporary.
3. Measurement tools to analyse prep reduction
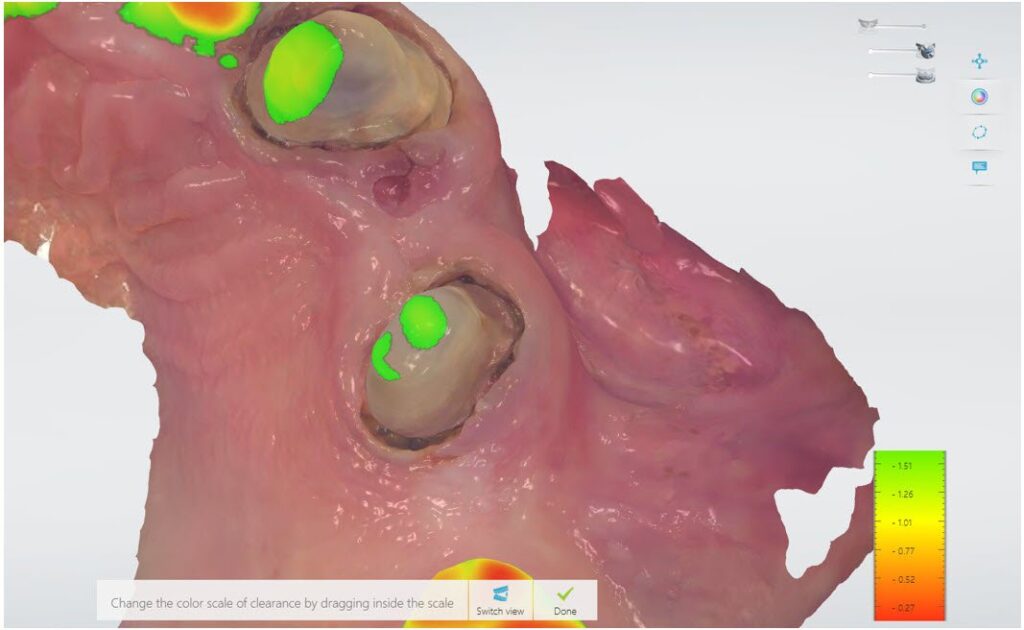
To confirm if there is enough tooth reduction for the material of choice, analyzing the reduction is highly recommended. As you can see from the color mapping, there is between 1.51 and 1.26 mm of space between the prep and the opposing tooth. Always be cognoscente of the minimum material thicknesses recommended by the manufacturer.
4. Margin Detection / Zoom
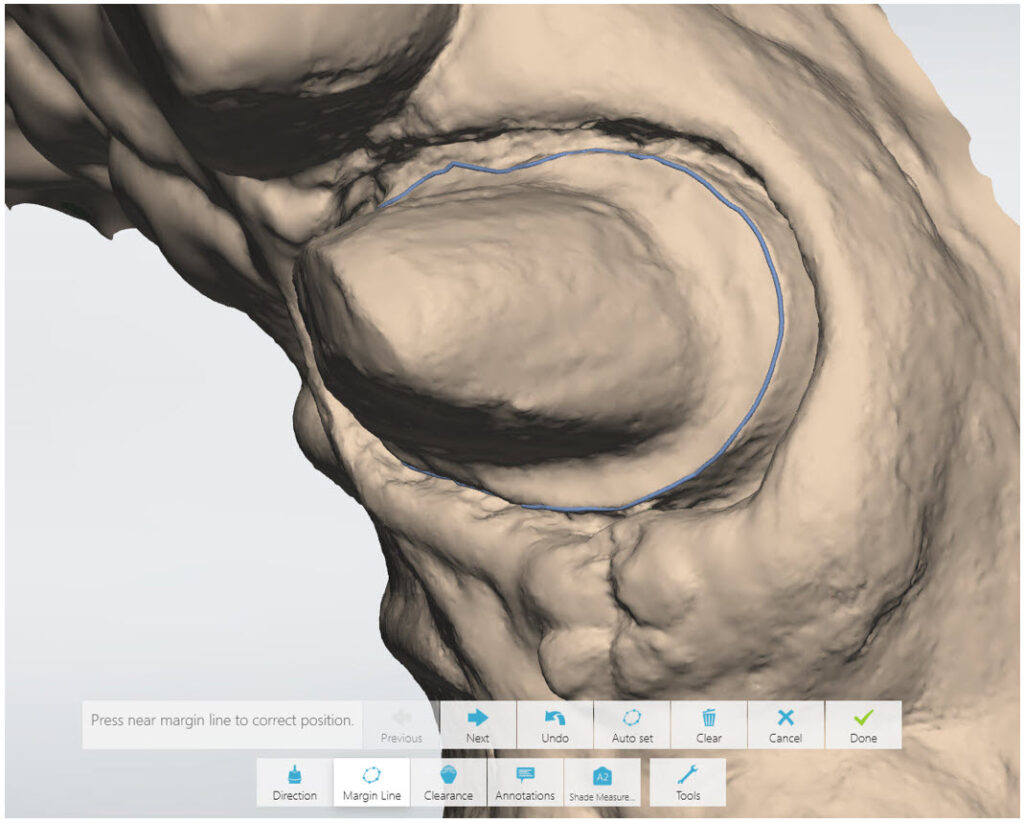
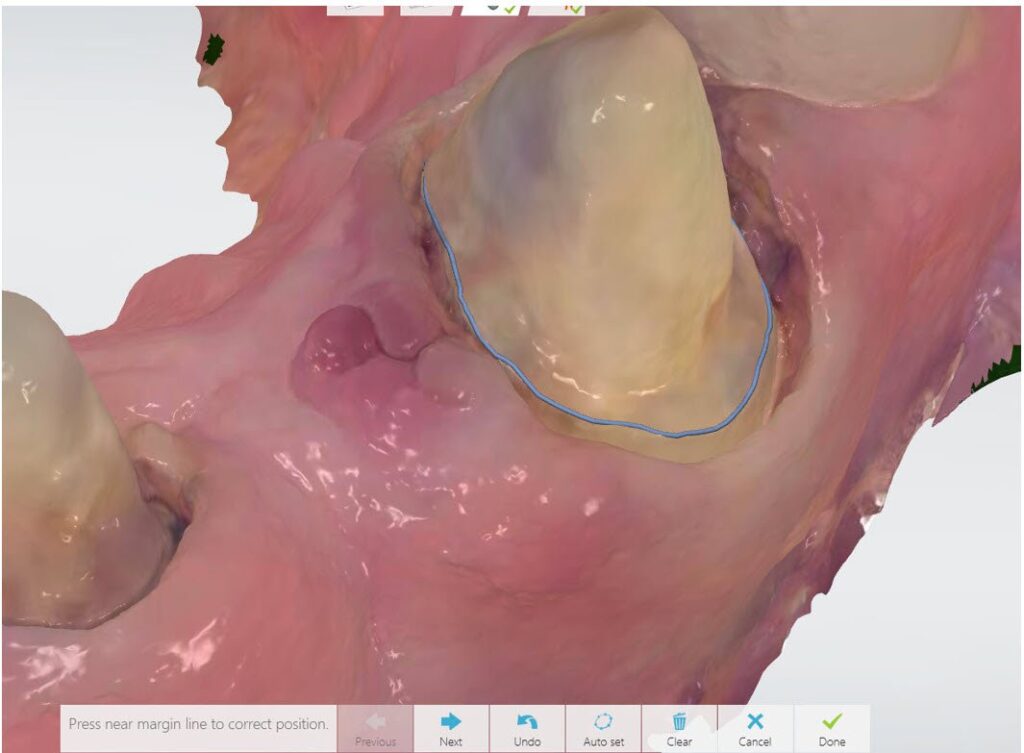
Number one, change the scan from color to no color (stone effect). This allows you to see the margins clearly and use the benefits of both to confirm your margins. If your IOS has a margin marking tool confirm that the margins marked are as they are in the mouth and there is a space between the tissue and the prep that is easily detected. This is best captured by using a two-cord technique or a single cord / laser technique. Keep the smaller size 0 or 1 cord in the sulcus as you gather the data confirming these are not covering the margins. If there is not a crisp margin, as you would normally see on a conventional PVS impression, repack the cord and scan again.
5. Pre-Prep Scans
Adding the option of a pre-prep scan is very helpful to the lab. This allows us to see what the tooth looked like prior to being prepped and tells us many things. We can analyse the wear facets, shape of the tooth and the occlusion. This is always recommended.
Summary
If the lab does not see margins, has improper occlusion or too deep of an undercut, the scan is at risk of being rejected and the patient must return for a new impression. The impressive tools that are offered with most digital impression systems is the ability to lock the sections of the impression that you like to delete and add in the corrected data. This allows for an exceptional impression every time.
To assist new IOS users, Schell has created LAB CHAT , a chat feature accessible on their website. Once a scan has been sent to the lab, open LAB CHAT at www.schelldental.ca and let the lab technicians know you have sent a scan and to analyse the data prior to dismissing the patient. This allows us to work as a team to assist in the best possible outcome for your patient.
Schell Dental Ceramics has a digital implementation specialist that can come to the office and train on most IOS systems. To reserve her time email or call the lab at info@schelldental.ca 250-861-3333